I recently came across a requirement where I had to support payments within Power Apps Portals and a few other interesting stuff that I believe is worth a record. To summarize all the lessons learned during this implementation I decided to write this post.
By the end of the article, we will have a Power Portals integrating with a payment gateway using a hosted payment page (Page hosted by the payment provider company, so you don’t need to handle payment sensitive details) and storing the results in the Microsoft Dataverse.
For the purposes of this demo, I will use GlobayPayments as my payment gateway provider but you can follow this example with any other payment provider.
Let’s start modeling our Demo environment. The first thing to do is to create a Payment table to hold the payment details and responses from the payment provider.
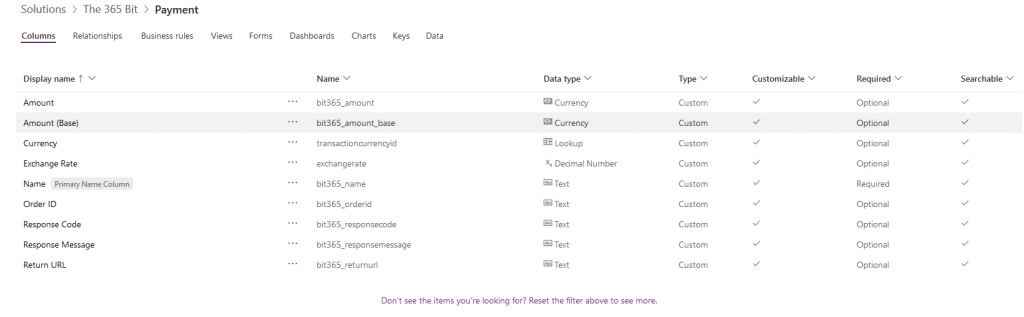
The Order ID will be used to identify the payment record within the payment gateway provider, Response Code and Response Message are there to store the result sent back once the transaction is executed and the Return URL is the URL that we will send to the payment gateway provider so they can redirect the user once the payment is processed.
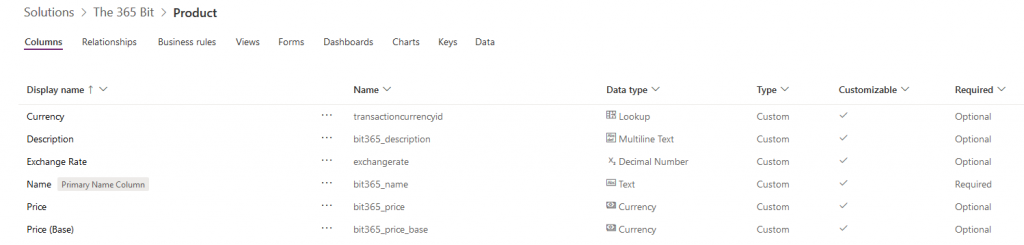
For educational purposes, we will also create a Product table so our client can choose a product with a specific price that will be then sent to the payment gateway.
That’s enough for our model, let’s work on the Power Portals side of things now:
We will need a Products page so the client can choose what they want to buy and for that, we will use Web Pages and Entity List.
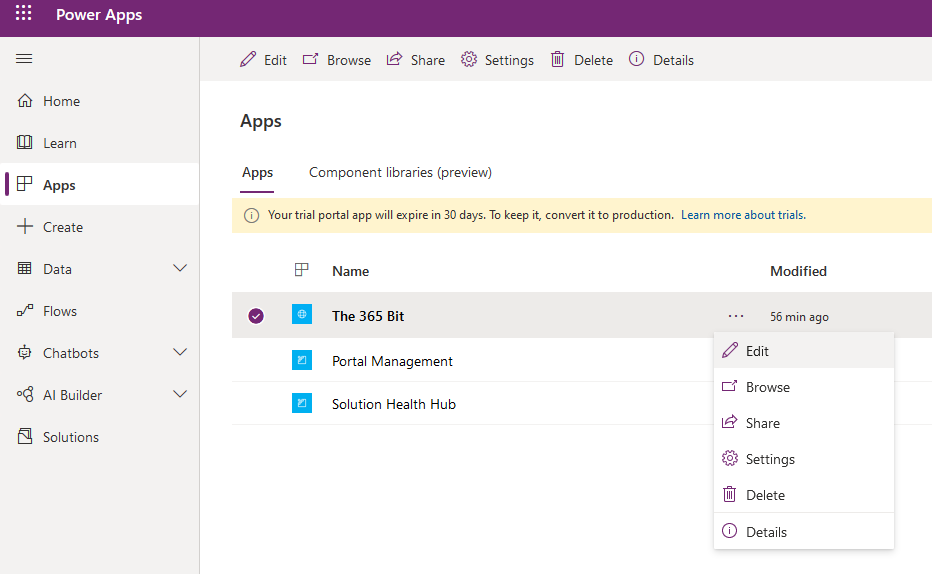
Start by going to the Power Portals Designer, which offers a simpler way to create Web Pages and Entity List
Click on New page on the top left menu and fill in the required fields
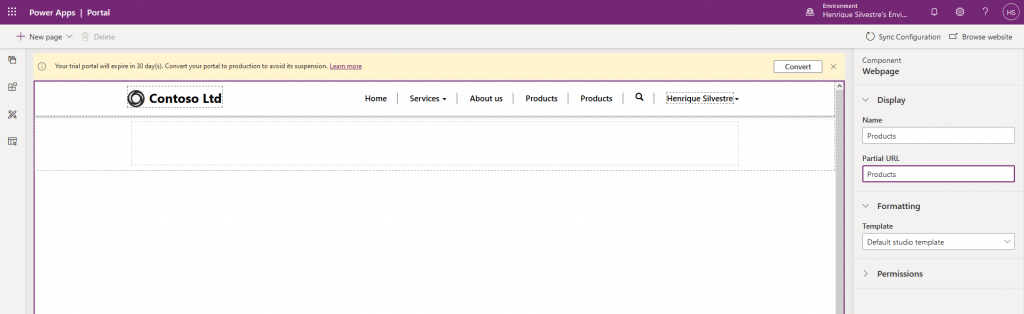
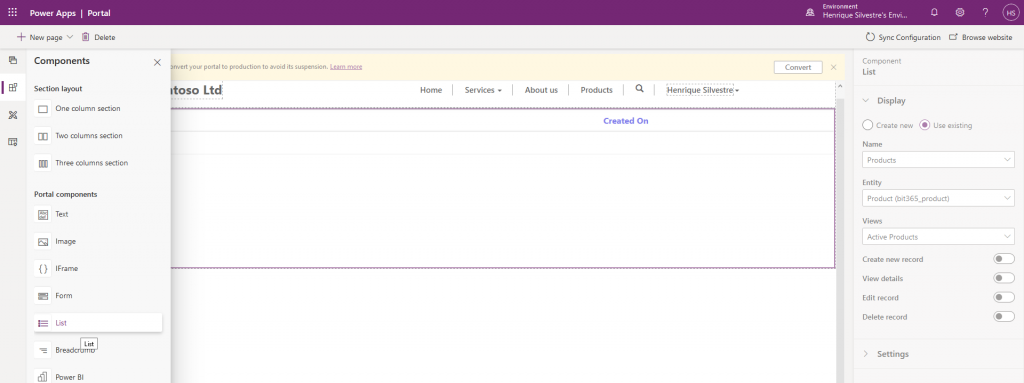
once the page is created, click on the second menu item “Components” and select the list that we will use to show the available products to the client. Select the Products table and the desired view.
While adding the list you have the option to choose from an existing list or create a new one.
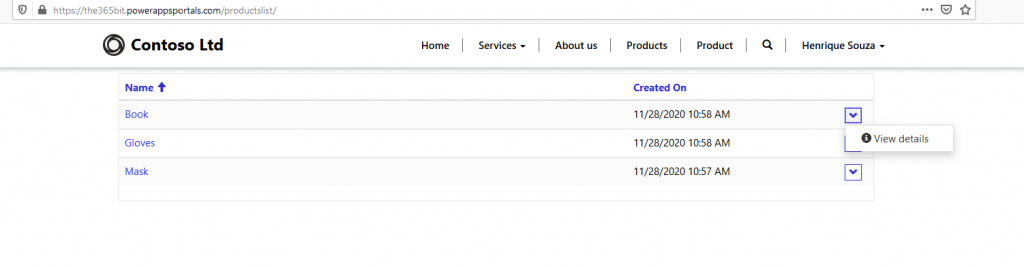
When you click on browse website the page should look like this if you added records to your table:

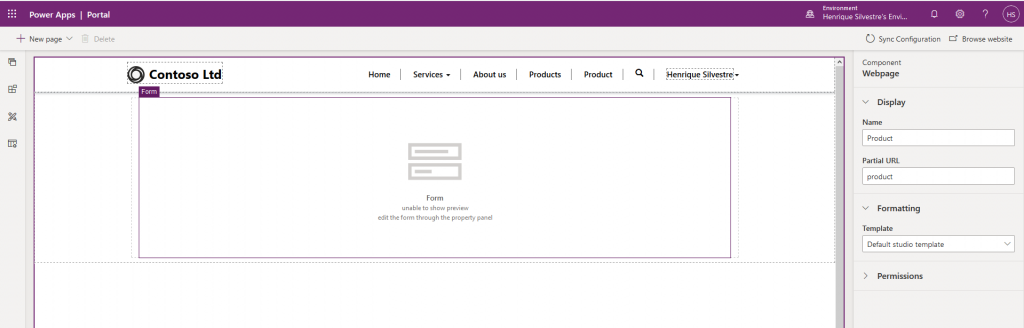
I want to give the customer the chance to view details for each product before purchasing it. To do that we need to create a Product Page, that will be rendered once the user clicks on a product from our Product List.
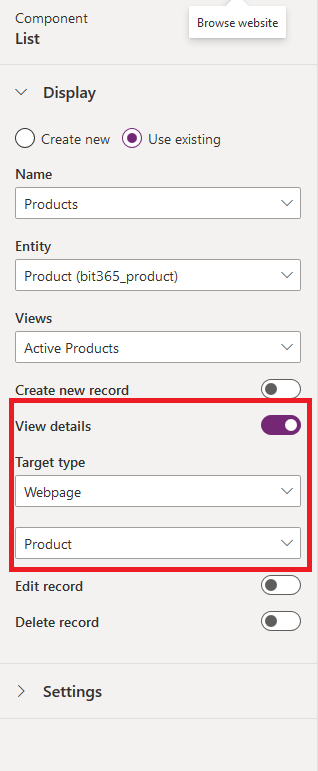
Once the Product Page is created, enable the View Details option in the Products List, set the Target Type to WebPage, and select the Product Page
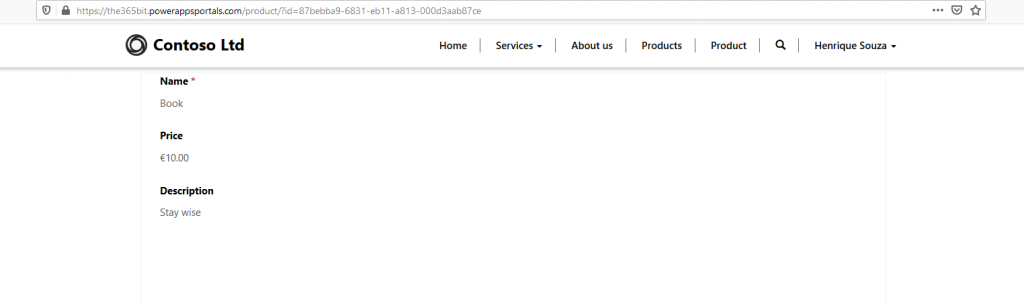
The product page should simply render a Form for the new Product table that was created.
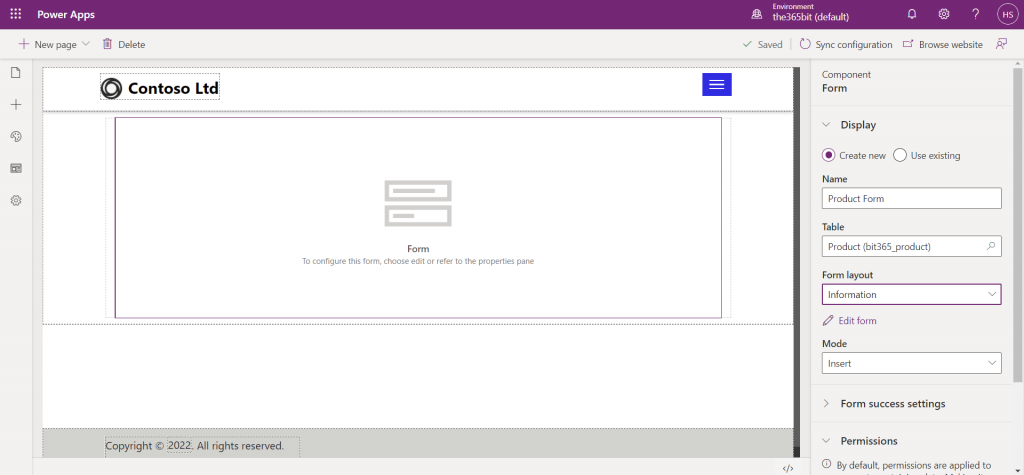
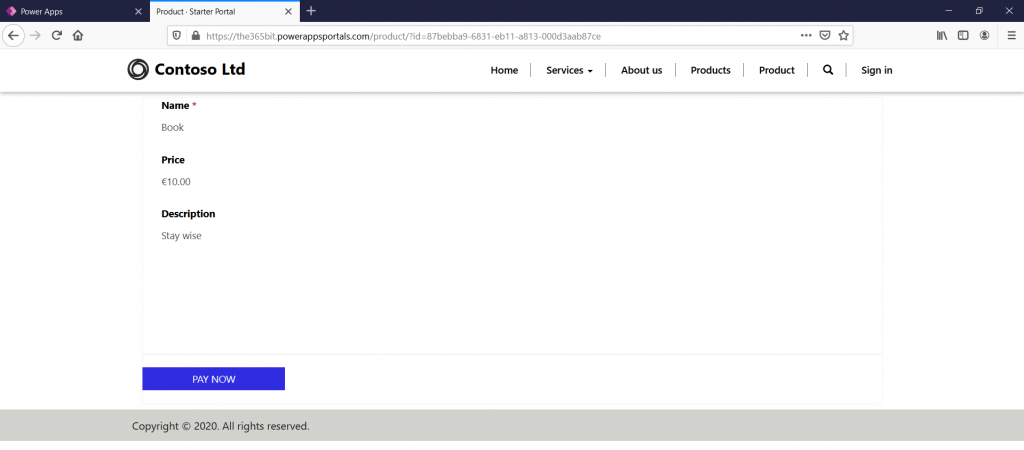
Now when the user clicks on a record from our Product List he will see the Product Page which is where we will add a “Pay Now” button
To add the Pay Now button we will use the Custom Javascript field in the Advanced tab of the Localized Content Page for the Product’s Page that we just created.

The following code will add a PAY NOW button to the form once the page is ready
$(document).ready(function () {

$("div.actions").append("<input type=’button’ id='paybtn' name=paybtn value='PAY NOW' class='submit-btn btn btn-primary form-action-container-left' />");

});
We now need to connect the created button with the Payment Gateway.
The way most of the Payment Gateway Providers work is by asking you to generate a request to their service with your account information plus the payment details that you want to process, send it to them via an HTTP along with a URL which they will send an HTTP request back letting you know the result of the operation.
In order to create the HTTP request to the payment provider we need to send some account information such as merchant ID, secrets, and credentials, and we don’t want to send the request from the client-side, to prevent exposing sensitive information, so we need to create the request from the server to keep the information private.
If you have a web application available you can write the HTTP request and response for the payment provider there, in this example I’m assuming you don’t so we will use Azure Functions which basically gives us the ability to process server-side code without needing to worry about infrastructure.
Each Payment Provider will have its own particularities, as for the Global Payments, it requires us to send a specific JSON to their service and we can easily do that by using the examples they provide in their documentation, changing the account details to our own:
            var service = new HostedService(new GpEcomConfig
            {
                MerchantId = "yourmerchantid",
                AccountId = "youraccountid",
                SharedSecret = "yoursharedsecret",
                ServiceUrl = "https://pay.sandbox.realexpayments.com/pay",
                HostedPaymentConfig = new HostedPaymentConfig {Version="2"}
            });

var hppJson = service.Charge(amount).WithCurrency("EUR").Serialize();
The hppJson object is the JSON that should be sent to the payment gateway to start the transaction.
But before creating the request we need to know which product is the client purchasing and get the value for the product from our Product table in the Microsoft Dataverse.
For security reasons we shouldn’t send the product price from the client, instead, we will send the product ID and on the server-side, fetch the product price using the product id.
Below you can see the code for the whole integration, we will go through the process of creating and setting the Azure function up in the next post, Part 2.
using System;
using System.IO;
using System.Threading.Tasks;
using Microsoft.AspNetCore.Mvc;
using Microsoft.Azure.WebJobs;
using Microsoft.Azure.WebJobs.Extensions.Http;
using Microsoft.AspNetCore.Http;
using Microsoft.Extensions.Logging;
using Newtonsoft.Json;
using GlobalPayments.Api;
using GlobalPayments.Api.Services;
using Xrm.Tools.WebAPI.Requests;
using GlobalPayments.Api.Entities;
using Newtonsoft.Json.Linq;
using System.Dynamic;
using Microsoft.IdentityModel.Clients.ActiveDirectory;
using Xrm.Tools.WebAPI;

namespace RealexIntegration
{
    public static class RealexIntegration
    {
        [FunctionName("Request")]
        public static async Task<IActionResult> RealexRequest(
            [HttpTrigger(AuthorizationLevel.Anonymous, "get", "post", Route = null)] HttpRequest req,
            ILogger log)
        {

            var productId = req.Query["productId"].ToString();

            //Sandbox
            var service = new HostedService(new GpEcomConfig
            {
                MerchantId = "yourmerchantid",
                AccountId = "internet",
                SharedSecret = "secret",
                ServiceUrl = "https://pay.sandbox.realexpayments.com/pay",
                HostedPaymentConfig = new HostedPaymentConfig { Version = "2" }
            });

            try
            {
                var api = InitDataVerseAPI();

                dynamic product = await api.Get("bit365_products", new Guid(productId),
                    new CRMGetListOptions { Select = new[] { "bit365_amount" } });

                var amount = (double)((dynamic)product).bit365_amount;

                // Add 3D Secure 2 Mandatory and Recommended Fields
                var hostedPaymentData = new HostedPaymentData
                {
                    CustomerEmail = "test@mail.com",
                    CustomerPhoneMobile = "353|08300000000" ,
                };

                var billingAddress = new Address
                {
                    StreetAddress1 = "sample address 1",
                    StreetAddress2 = "sample address 2",
                    StreetAddress3 = "sample address 3",
                    City = "sample city",
                    PostalCode = "00 000",
                    Country = "372" // ISO 3166-1
                };

                var hppJson = service.Charge(Decimal.Parse(amount.ToString()))
                    .WithCurrency("EUR")
                    .WithAddress(billingAddress, AddressType.Billing)
                    .WithHostedPaymentData(hostedPaymentData)
                    .Serialize();

                var orderId = ((JValue)((JObject)(JsonConvert.DeserializeObject(hppJson))).GetValue("ORDER_ID")).Value;

                //dynamic product = new ExpandoObject();
                //product.bit365_productid = productId;

                dynamic payment = new ExpandoObject();
                payment.bit365_orderid = orderId;
                payment.bit365_product = product;

                await api.Create("bit365_payments", payment);

                return new OkObjectResult(hppJson);

            }
            catch (ApiException exce)
            {
                return new JsonResult($"Error {exce.Message}");
            }

        }

        [FunctionName("Response")]
        public static IActionResult RealexResponse(
            [HttpTrigger(AuthorizationLevel.Anonymous, "post", Route = null)] HttpRequest req,
            ILogger log)
        {
            log.LogInformation("Start");

            var service = new HostedService(new GpEcomConfig
            {
                MerchantId = "yourmerchantid",
                AccountId = "internet",
                SharedSecret = "secret",
                ServiceUrl = "https://pay.sandbox.realexpayments.com/pay",
                HostedPaymentConfig = new HostedPaymentConfig { Version = "2" }
            });

            var responseJson = req.Form["hppResponse"];

            try
            {
                log.LogInformation("Before Parse Response with Payment Service");

                Transaction response = service.ParseResponse(responseJson, true);
                var orderId = response.OrderId; // GTI5Yxb0SumL_TkDMCAxQA
                var responseCode = response.ResponseCode; // 00
                var responseMessage = response.ResponseMessage; // [ test system ] Authorised
                var responseValues = response.ResponseValues; // get values accessible by key
                var passRef = responseValues["PASREF"]; // PASS
                var authCode = responseValues["AUTHCODE"]; // AuthCode

                var api = InitDataVerseAPI();

                dynamic paymentUpdated = new ExpandoObject();
                paymentUpdated.bit365_responsecode = responseCode;

                dynamic payment = api.Get<ExpandoObject>("bit365_payments", $"bit365_orderid='{response.OrderId}'", new CRMGetListOptions
                {
                    Select = new[] { "bit365_returnurl", "bit365_paymentid" }
                }).Result;

                api.Update("bit365_payments", $"bit365_orderid='{response.OrderId}'", paymentUpdated);

                return new RedirectResult(payment.bit365_returnurl, true);
            }
            catch (ApiException exce)
            {
                return new JsonResult($"Error {exce.Message}");
            }

        }

        private static CRMWebAPI InitDataVerseAPI()
        {
            string serviceUrl = "https://yourorg.crm4.dynamics.com/";
            string clientId = "yourclientid";
            string secret = "yoursecret";

            AuthenticationContext authContext = new AuthenticationContext
                ("https://login.microsoftonline.com/tenantId");
            ClientCredential credential = new ClientCredential(clientId, secret);

            AuthenticationResult result = authContext.AcquireTokenAsync(serviceUrl, credential).Result;

            string accessToken = result.AccessToken;

            return new CRMWebAPI($"{serviceUrl}/api/data/v9.1/", accessToken);
        }
    }
}


Hi,
First of all, thank you for share your knowledge.
So, is there the second part? I am working in this kind of issue now and the explanation you were keeping was pretty good.
Hi, Thanks for the interest in the article, part 2 is now released here. https://the365bit.com/2022/01/19/payments-in-power-app-portals-part-2/
Can we have a part 2 🙂 dont leave us hanging as I want to point some new Power App Portal Devs at this to build their skills.
Hi, Thanks for the interest in the article, part 2 is now released here. https://the365bit.com/2022/01/19/payments-in-power-app-portals-part-2/
When you will provide the next blog
Hi, Thanks for the interest in the article, part 2 is now released here. https://the365bit.com/2022/01/19/payments-in-power-app-portals-part-2/
Good Day,
Thank you for posting and sharing. Is part Two of this article going to be shared soon?
Hi, Thanks for the interest in the article, part 2 is now released here. https://the365bit.com/2022/01/19/payments-in-power-app-portals-part-2/