I haven’t been able to post for a while but hopefully, this will change this year, and to start off with the right foot I’d like to share the second part of the Payments in Power Apps Portals post that I released earlier in 2021.
In the previous post, we’ve just added the “Pay Now” button and now we need to attach a function to the button that will initialize the payment integration, if you just got here or forgot where we left off please read Part 1 of this article.
With that said let’s start by creating the azure function that will host the code previously shared.
Creating the Azure function to handle the payment information
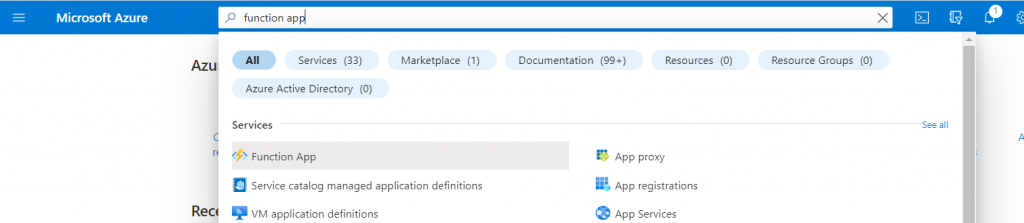
Go to www.portal.azure.com and look for Function App on the search box.
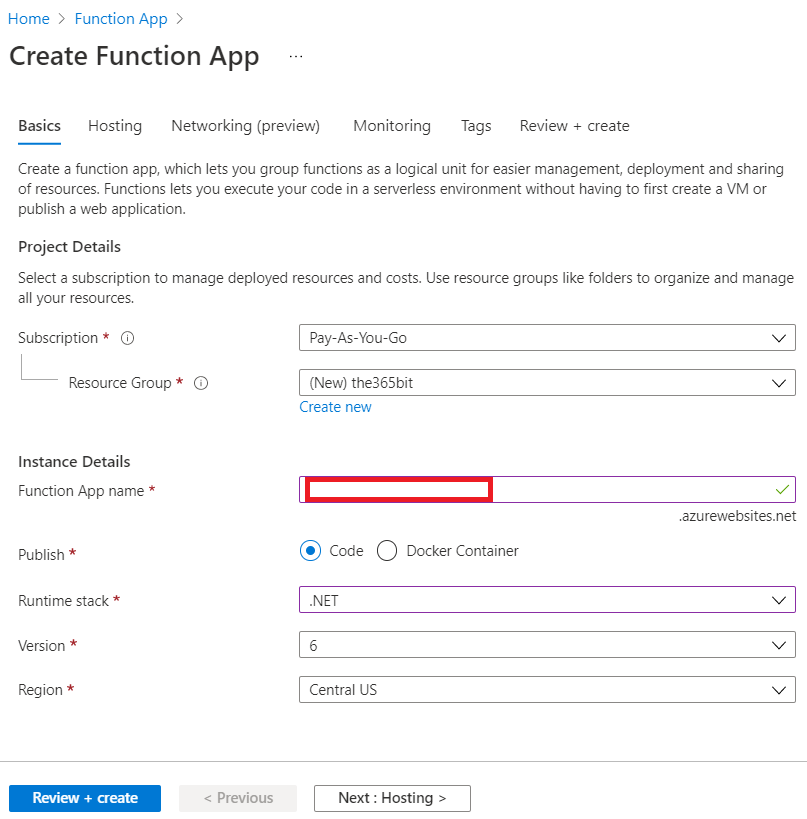
Click on create and set the details up, specifying which azure subscription you will use to host the function, the resource group to be used, the URL which the function will be called, and the runtime stack. In my case I’m writing my function in C# but you can use Java, Python, NodeJS, Powershell or a custom handler. The other tabs will give you more control over other aspects but I won’t drill into it, you can find more information here.
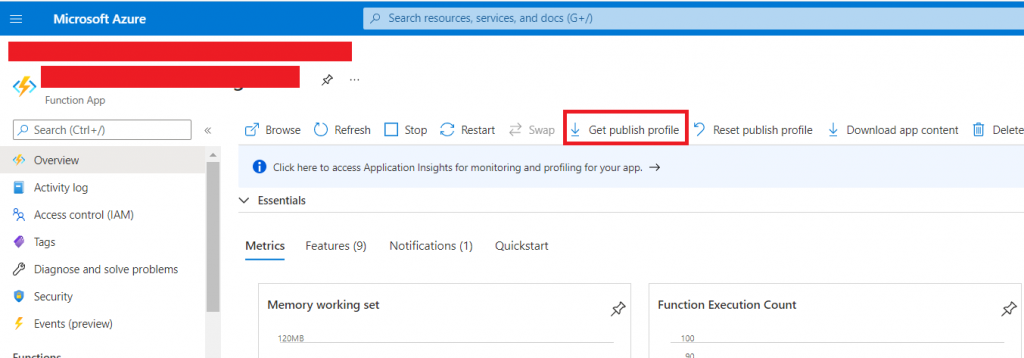
Configure, review and create the function, this will start the deployment, and once completed go ahead and check the resource that was deployed. You should be looking at a screen that looks like the one below. Download the publish profile that we will use to deploy our code from our local machine to the cloud.
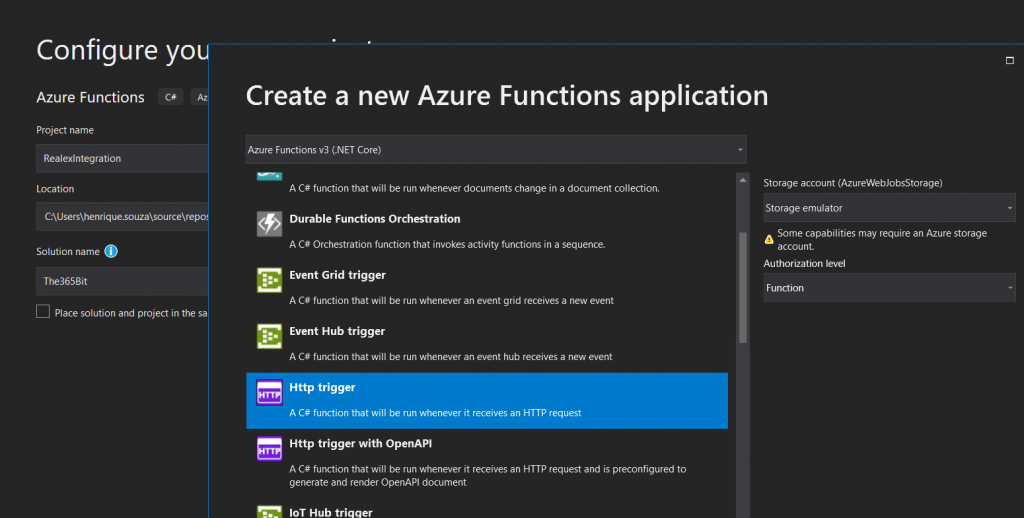
Open Visual Studio and Create a new project using the Azure Functions template, select HTTP for our function trigger as we will send an HTTP request from our portal page.
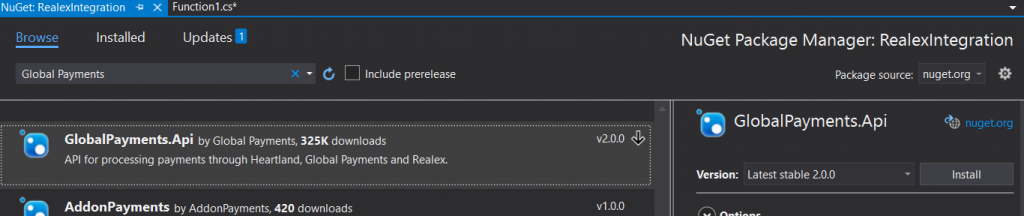
The payment gateway that we chose like many others, has an SDK that can be used to facilitate the integration, although not required it does speed things up as they usually encapsulate the complexity and expose simpler methods to send and receive information. I’ll use the SDK provided by Global Payments – Realex.
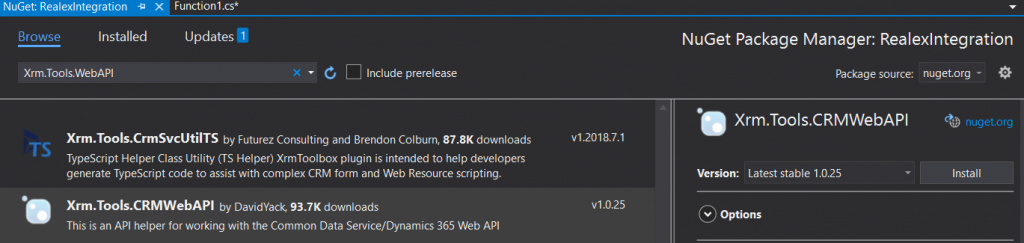
I’ll also use an SDK to connect our function with the Dataverse, since we need to be able to fetch the product price and update the payment once the user finishes the transaction. I’ll use Xrm.Tool.CRMWebAPI by DavidYack.
Apart from these 2, the only external DLLs that you will need to add to your project is: Microsoft.IdentityModel.Clients.ActiveDirectory because we need to be able to authenticate our function with Dataverse and Newtonsoft.Json so we can parse the objects that are sent and received.
Now we should be able to write the following code that will handle the Request and Response to and from our payment provider:
using System;
using System.IO;
using System.Threading.Tasks;
using Microsoft.AspNetCore.Mvc;
using Microsoft.Azure.WebJobs;
using Microsoft.Azure.WebJobs.Extensions.Http;
using Microsoft.AspNetCore.Http;
using Microsoft.Extensions.Logging;
using Newtonsoft.Json;
using GlobalPayments.Api;
using GlobalPayments.Api.Services;
using Xrm.Tools.WebAPI.Requests;
using GlobalPayments.Api.Entities;
using Newtonsoft.Json.Linq;
using System.Dynamic;
using Microsoft.IdentityModel.Clients.ActiveDirectory;
using Xrm.Tools.WebAPI;

namespace RealexIntegration
{
    public static class RealexIntegration
    {
        [FunctionName("Request")]
        public static async Task<IActionResult> RealexRequest(
            [HttpTrigger(AuthorizationLevel.Anonymous, "get", "post", Route = null)] HttpRequest req,
            ILogger log)
        {

            var productId = req.Query["productId"].ToString();

            //Sandbox
            var service = new HostedService(new GpEcomConfig
            {
                MerchantId = "yourmerchantid",
                AccountId = "internet",
                SharedSecret = "secret",
                ServiceUrl = "https://pay.sandbox.realexpayments.com/pay",
                HostedPaymentConfig = new HostedPaymentConfig { Version = "2" }
            });

            try
            {
                var api = InitDataVerseAPI();

                dynamic product = await api.Get("bit365_products", new Guid(productId),
                    new CRMGetListOptions { Select = new[] { "bit365_amount" } });

                var amount = (double)((dynamic)product).bit365_amount;

                // Add 3D Secure 2 Mandatory and Recommended Fields
                var hostedPaymentData = new HostedPaymentData
                {
                    CustomerEmail = "test@mail.com",
                    CustomerPhoneMobile = "353|08300000000" ,
                };

                var billingAddress = new Address
                {
                    StreetAddress1 = "sample address 1",
                    StreetAddress2 = "sample address 2",
                    StreetAddress3 = "sample address 3",
                    City = "sample city",
                    PostalCode = "00 000",
                    Country = "372" // ISO 3166-1
                };

                var hppJson = service.Charge(Decimal.Parse(amount.ToString()))
                    .WithCurrency("EUR")
                    .WithAddress(billingAddress, AddressType.Billing)
                    .WithHostedPaymentData(hostedPaymentData)
                    .Serialize();

                var orderId = ((JValue)((JObject)(JsonConvert.DeserializeObject(hppJson))).GetValue("ORDER_ID")).Value;

                //dynamic product = new ExpandoObject();
                //product.bit365_productid = productId;

                dynamic payment = new ExpandoObject();
                payment.bit365_orderid = orderId;
                payment.bit365_product = product;

                await api.Create("bit365_payments", payment);

                return new OkObjectResult(hppJson);

            }
            catch (ApiException exce)
            {
                return new JsonResult($"Error {exce.Message}");
            }

        }

        [FunctionName("Response")]
        public static IActionResult RealexResponse(
            [HttpTrigger(AuthorizationLevel.Anonymous, "post", Route = null)] HttpRequest req,
            ILogger log)
        {
            log.LogInformation("Start");

            var service = new HostedService(new GpEcomConfig
            {
                MerchantId = "yourmerchantid",
                AccountId = "internet",
                SharedSecret = "secret",
                ServiceUrl = "https://pay.sandbox.realexpayments.com/pay",
                HostedPaymentConfig = new HostedPaymentConfig { Version = "2" }
            });

            var responseJson = req.Form["hppResponse"];

            try
            {
                log.LogInformation("Before Parse Response with Payment Service");

                Transaction response = service.ParseResponse(responseJson, true);
                var orderId = response.OrderId; // GTI5Yxb0SumL_TkDMCAxQA
                var responseCode = response.ResponseCode; // 00
                var responseMessage = response.ResponseMessage; // [ test system ] Authorised
                var responseValues = response.ResponseValues; // get values accessible by key
                var passRef = responseValues["PASREF"]; // PASS
                var authCode = responseValues["AUTHCODE"]; // AuthCode

                var api = InitDataVerseAPI();

                dynamic paymentUpdated = new ExpandoObject();
                paymentUpdated.bit365_responsecode = responseCode;

                dynamic payment = api.Get<ExpandoObject>("bit365_payments", $"bit365_orderid='{response.OrderId}'", new CRMGetListOptions
                {
                    Select = new[] { "bit365_returnurl", "bit365_paymentid" }
                }).Result;

                api.Update("bit365_payments", $"bit365_orderid='{response.OrderId}'", paymentUpdated);

                return new RedirectResult(payment.bit365_returnurl, true);
            }
            catch (ApiException exce)
            {
                return new JsonResult($"Error {exce.Message}");
            }

        }

        private static CRMWebAPI InitDataVerseAPI()
        {
            string serviceUrl = "https://yourorg.crm4.dynamics.com/";
            string clientId = "yourclientid";
            string secret = "yoursecret";

            AuthenticationContext authContext = new AuthenticationContext
                ("https://login.microsoftonline.com/yourtenantid");
            ClientCredential credential = new ClientCredential(clientId, secret);

            AuthenticationResult result = authContext.AcquireTokenAsync(serviceUrl, credential).Result;

            string accessToken = result.AccessToken;

            return new CRMWebAPI($"{serviceUrl}/api/data/v9.1/", accessToken);
        }
    }
}
IMPORTANT: The code above should not be used in production before adding appropriate security and business validations that goes beyond the scope of this blog post.
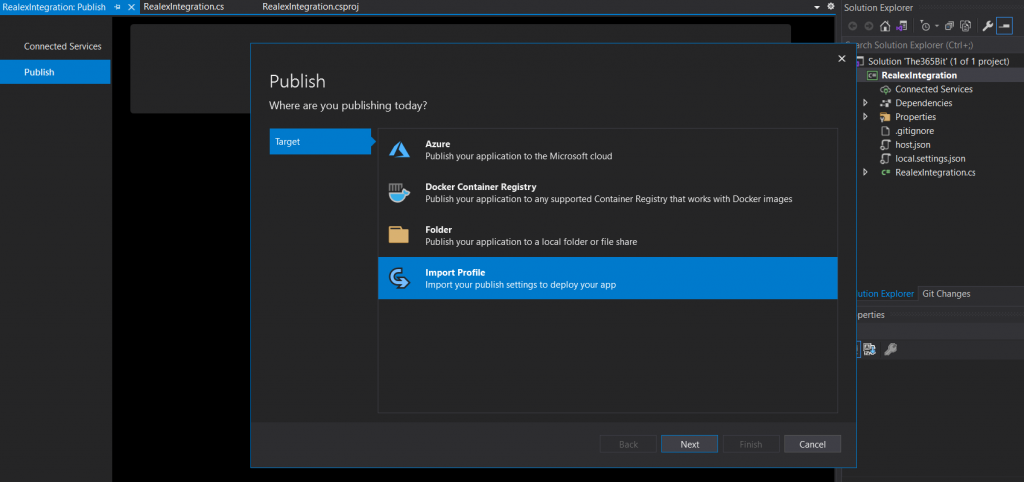
To publish your function to Azure, right-click your project in VS Studio e click Publish, we’ll use the Import Profile option as we’ve downloaded it when we created the Azure function. Once finished, the functions will be available in your azure portal and “Online” ready to be invoked.
Accessing the Dataverse from an Azure Function
As I mentioned earlier, our function needs to send an authentication request to Dataverse in order to retrieve the payment information. Azure functions are independent of the Dataverse meaning that you need to grant your function permission to access Dataverse’s records, since it’s a common requirement and not exclusive to payment integration, I wrote a post about it here.
Customizing the Product Page
We have a “Pay Now” button and an Azure Function with a Request and Response method to be used to process payments, but we need to wrap them together, and we do that using javascript.
I want to give the external user a pop-up confirmation before sending him/her to the payment provider screen, so I’ll edit the Product page adding a plain bootstrap modal that will be shown when the user clicks on the “Pay Now” button
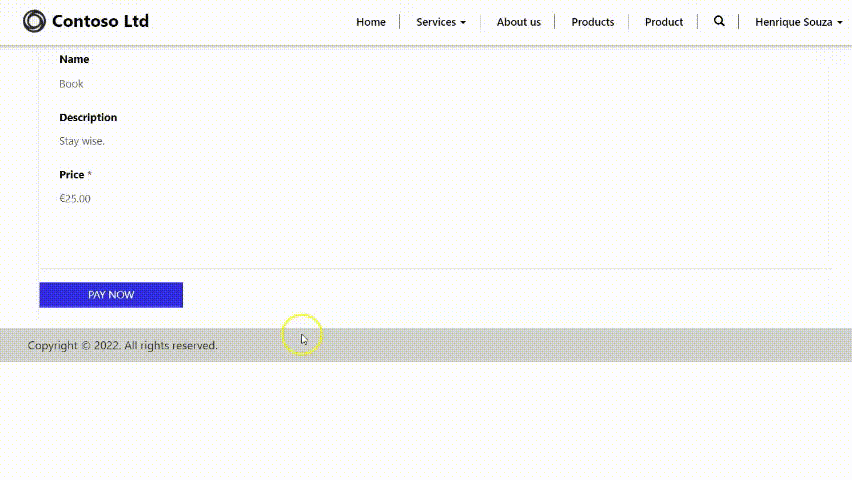
If you open the Product webpage, go to the General tab, and scroll down you should see something similar to this:
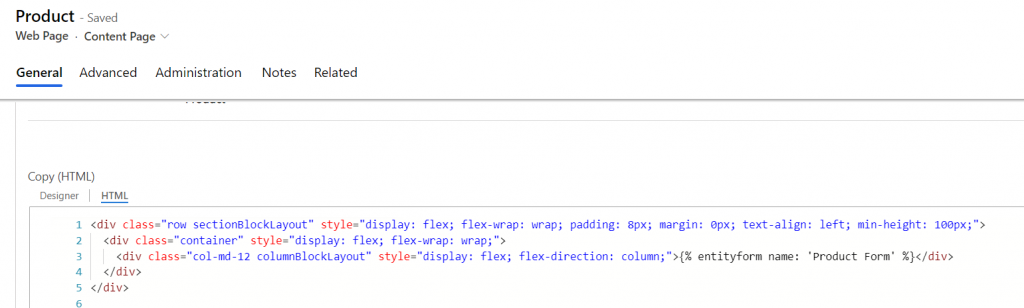
I’ll simply add a standard bootstrap code for the modal on the bottom:
<div id="paymentModal" tabindex="-1" role="dialog" aria-labelledby="paymentModalLabel" aria-hidden="true" class="modal fade">
    <div role="document" class="modal-dialog">
        <div class="modal-content">
            <div class="modal-header">
                <h5 id="paymentModalLabel" class="modal-title">Processing Payment</h5><br>
                <div class="alert alert-warning">Test</div><button type="button" data-dismiss="modal" aria-label="Close" class="close"><span aria-hidden="true">×</span></button>
            </div>
            <div class="modal-body">
                <table class="table">
                    <thead>
                        <tr>
                            <th scope="col">Amount</th>
                        </tr>
                    </thead>
                    <tbody>
                        <tr>
                            <td id="payPN"></td>
                            <td id="payAmount"></td>
                        </tr>
                    </tbody>
                </table>
                Your payment will be processed by a Secure Payment Environment, click OK to continue.
            </div>
            <div class="modal-footer"><button type="button" data-dismiss="modal" class="btn btn-secondary">Close</button><button type="button" id="payBtnModal" data-dismiss="modal" class="btn btn-primary">OK</button></div>
        </div>
    </div>
</div>
Bootstrap modals are hidden by default until you trigger them via HTML or JS and we will do it using JS when the user clicks on the Pay Now button, to start the process.
Because of the nature of our payment integration (Hosted Payment Provider), we don’t need to worry about storing payment information, the payment provider does that for us, but in order for that to happen we need to send the user to the payment provider’s screen that will capture the data. There are many ways of doing that but an easy one is to use an SDK provided by the payment provider. Global Payments, such as many others companies, provides a client-side SDK that opens up an Iframe with the payment screen, the SDK is basically a Javascript library that we need to load in our page.
Ideally, we should save it as a snippet and include it within our page to keep the code simple and tidy, but for simplicity sake, I’ll add it at the bottom of our page along with the other code that we will use:
var The365Bit = The365Bit || {};

The365Bit.Functions = {

    CreatePayment: function () {

        // Call to the azure function 'Request' passing the product ID as
        // Parameter and create the payment with the product price
        $.getJSON("https://yourappurl.azurewebsites.net/api/Request?productId=" +
        The365Bit.Functions.GetUrlParameter("productId"), function (jsonFromRequestEndpoint) {
                // Realex SDK call to initialize the payment process
                RealexHpp.setHppUrl("https://pay.sandbox.realexpayments.com/pay");

                $("#payAmount").text("€ " + jsonFromRequestEndpoint.AMOUNT.slice(0, -2) + "." + jsonFromRequestEndpoint.AMOUNT.slice(-2));

                $("#paymentModal").modal();

                window.setTimeout(function () {
                    // Realex SDK call to open the Payment modal
                    RealexHpp.lightbox.init("payBtnModal", "https://yourappurl.azurewebsites.net/api/Response", jsonFromRequestEndpoint);
                }, 0);
            });
    },
    // Auxiliar function to retrieve parameters from the URL
    GetUrlParameter: function getUrlParameter(sParam) {
        try {
            var sPageURL = window.location.search.substring(1),
                sURLVariables = sPageURL.split('&'),
                sParameterName,
                i;

            for (i = 0; i < sURLVariables.length; i++) {
                sParameterName = sURLVariables[i].split('=');

                if (sParameterName[0] === sParam) {
                    return sParameterName[1] === undefined ? true : decodeURIComponent(sParameterName[1]);
                }
            }
        } catch (error) {
            throw new error;
        }

    },

}

$(document).ready(function () {

    // Adding the Pay Now Button
    $("div.actions").append("<input type=’button’ id='paybtn' name=paybtn value='PAY NOW' class='submit-btn btn btn-primary form-action-container-left' />");

    // Attaching the Create Payment function to the button
    $("#paybtn").on("click", The365Bit.Functions.CreatePayment);

});

// {{Global Payments SDK should be inserted here}}
HTML done, JS done, clear the cache, and try the button out.
If everything is fine when you click PAY NOW the CreatePayment function will send an HTTP request to our Request method in the Azure function, and because our function doesn’t really trust strangers calling it, it will return a CORS error.
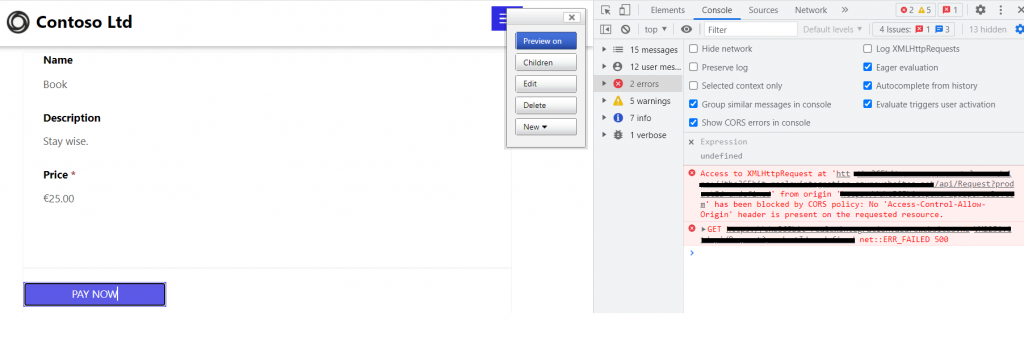
To fix that we need to add the Portal domain to the list of trusted websites in the CORS configuration for our Azure function, so go back to the Azure portal, and on the left menu when editing the Azure function app click on CORS:
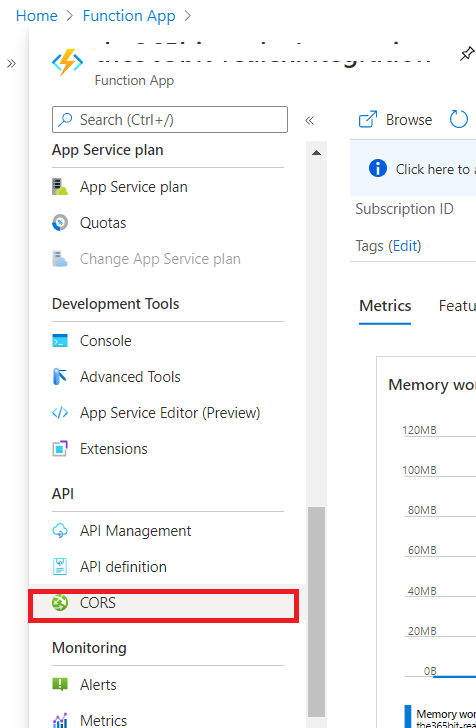
Add your portal URL, save and try the PAY NOW button again
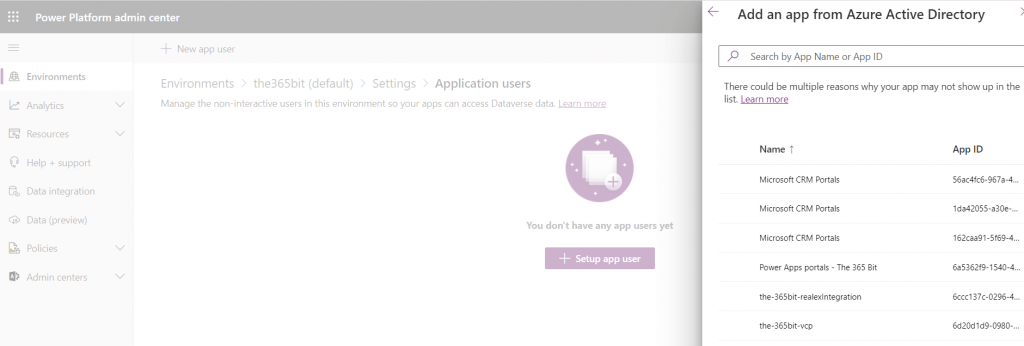
The CORS issue should be now fixed but the application that we’ve set up doesn’t really have Dataverse privileges since we haven’t assigned a security role to it yet, so let’s do that.
Open the Power Platform admin center, find the environment that you are working on and go to Settings > Users and Application Users and select the application that was created earlier, assigning a security role to it.
Save and try the Pay Now button again, you should see the modal that we’ve created poping up
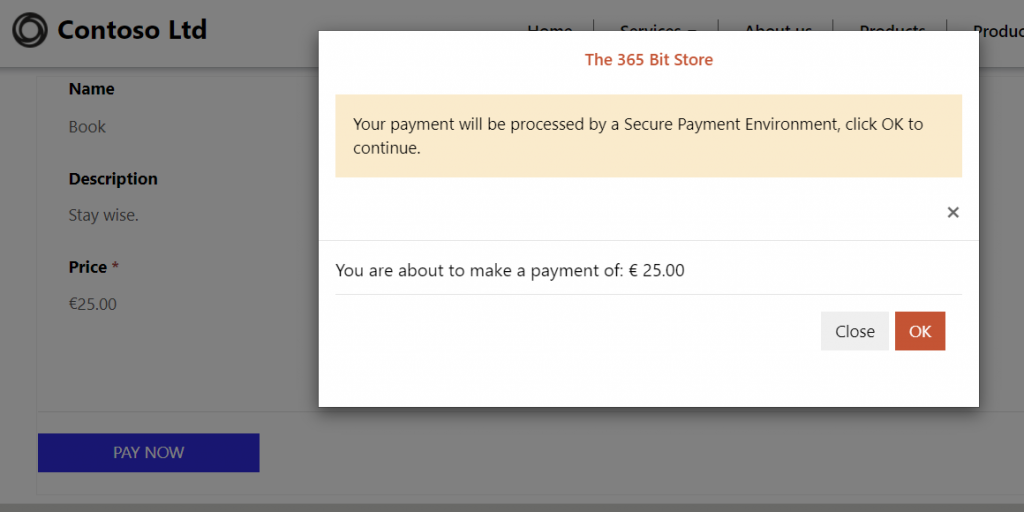
And once the user confirms, the payment provider screen should show up asking for the payment details.
All the code used in this article can be found here.


1 Response
[…] Below you can see the code for the whole integration, we will go through the process of creating and setting the Azure function up in the next post, Part 2. […]